Introduction
In this project, I explored a pre-trained diffusion model by implementing diffusion sampling loops, and using them to do tasks such as inpainting and image anagram creation. I then implemented and deployed my own diffusion model for image generation that was trained on the MNIST dataset.
Part A: The Power of Diffusion Models!
In this part, I am exploring the diffusion model DeepFloyd, a two-stage model trained by StabilityAI.
Part 0: Setup
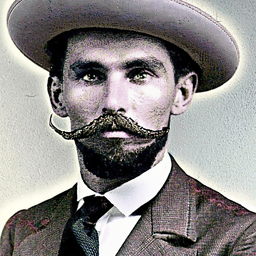
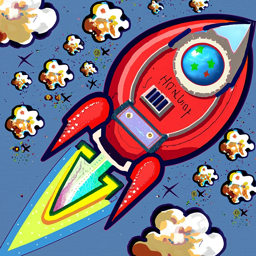
Verifying I have imported everything correctly and checking against our text prompts.
The following are the parameters I used for setup and verification:
First row: num_inference_steps = 24
Second row: num_inference_steps = 235
Random seed: 230524
Prompts used:
- an oil painting of a snowy mountain village
- a man wearing a hat
- a rocket ship
Results:
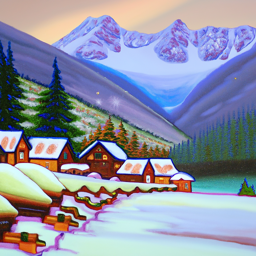
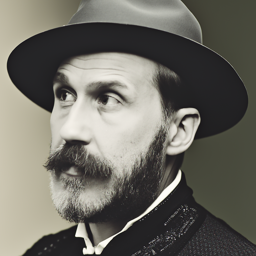
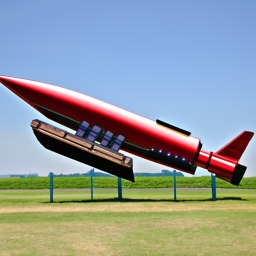
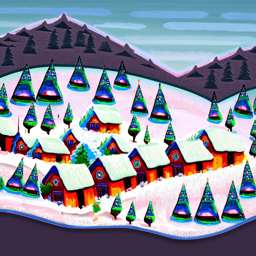
Part 1: Sampling Loops
Part 1.1: Implementing the Forward Process
In this part, I implemented a forward process, which takes a clean image and adds noise. The forward process in diffusion models serves as the foundation for training and generating data. By systematically corrupting data into noise, it helps the model learn how to reverse the process step by step, enabling high-quality data generation.

Berkeley Campanile

Noisy Campanile at t=250

Noisy Campanile at t=500

Noisy Campanile at t=750
Part 1.2: Classical Denoising
I tried denoising the noisy images using classical methods like Gaussian blur. However, it isn't the best.

Noisy Campanile at t=250

Noisy Campanile at t=500

Noisy Campanile at t=750

Gaussian Blur Denoising at
t=250

Gaussian Blur Denoising at
t=500

Gaussian Blur Denoising at
t=750
Part 1.3: One-Step Denoising
We can train models to denoise images. Here are the results of a one-step denoising using the DeepFloyd model. We can notice that the one-step denosing at t=750 doesn't look exactly like the Campanile. The final image is blurred and it isn't resemabling the original image that well.

Noisy Campanile at t=250

Noisy Campanile at t=500

Noisy Campanile at t=750

One-Step Denoised Campanile
at t=250

One-Step Denoised Campanile
at t=500

One-Step Denoised Campanile
at t=750
Part 1.4: Iterative Denoising
The denoising process can be greatly improved by iterativly denoising the image. This can be thought of as a linear interpolation between the signal and noise, and we are getting closer to the signal at each time step.

Noisy Campanile at t=90

Noisy Campanile at t=240

Noisy Campanile at t=390

Noisy Campanile at t=540

Noisy Campanile at t=690

Original

Iteratively Denoised Campanile

One-Step Denoised Campanile

Gaussian Blurred Campanile
Part 1.5: Diffusion Model Sampling
The diffusion model can also be used to generate images from scratch. We do this by letting the diffusion model denoise pure noise. However, these aren't the best images; it is noticeable that something isn't right.

Sample 1

Sample 2

Sample 3

Sample 4

Sample 5
Part 1.6: Classifier-Free Guidance (CFG)
We can improve the sampled results from before by implementing Classifier-Free Guidance. This method "nudges" the model into giving something more sensical.

Sample 1 with CFG

Sample 2 with CFG

Sample 3 with CFG

Sample 4 with CFG

Sample 5 with CFG
Part 1.7: Image-to-image Translation
We can also use the model to do image to image translation. This is achieved by taking a test image, then adding some noise to it, and try to force it back onto the image manifold without any conditioning.

i_start=1

i_start=3

i_start=5

i_start=7

i_start=10

i_start=20

Original

i_start=1

i_start=3

i_start=5

i_start=7

i_start=10

i_start=20

Original

i_start=1

i_start=3

i_start=5

i_start=7

i_start=10

i_start=20

Original
Part 1.7.1: Editing Hand-Drawn and Web Images
We can also try to force drawings, or other nonrealstic images onto the image manifold.

i_start=1

i_start=3

i_start=5

i_start=7

i_start=10

i_start=20

Original

i_start=1

i_start=3

i_start=5

i_start=7

i_start=10

i_start=20

Original

i_start=1

i_start=3

i_start=5

i_start=7

i_start=10

i_start=20

Original
Part 1.7.2: Inpainting
We can use the diffusion model to add specific content in areas we choose, and it should smeamlessly blend in.

Campanile

Mask

Hole to Fill

Campanile Inpainted

Giraffe

Mask

Hole to Fill

Giraffe Inpainted

Giraffe

Mask

Hole to Fill

Giraffe Inpainted
Part 1.7.3: Text-Conditional Image-to-image Translation
We can force noise to a certain image using text prompts. Even though some of the output pictures aren't exactly like the text prompt, we see that the output as it gets closer to the original image, starts to have the same structure as the original, which is granted.

Rocket Ship at
noise level 1

Rocket Ship at
noise level 3

Rocket Ship at
noise level 5

Rocket Ship at
noise level 7

Rocket Ship at
noise level 10

Rocket Ship at
noise level 20

Original Campanile

Dog at
noise level 1

Dog at
noise level 3

Dog at
noise level 5

Dog at
noise level 7

Dog at
noise level 10

Dog at
noise level 20

Original Train

Village at
noise level 1

Village at
noise level 3

Village at
noise level 5

Village at
noise level 7

Village at
noise level 10

Village at
noise level 20

Original Bridge
Part 1.8: Visual Anagrams
We can also use the diffusion model to create visual anagrams. We denoise two images/pure noise, then average them together and repeat the process. For one noise, we will flip it when we are sending it through the model, and reflip it when we use it get the average.

An Oil Painting of an Old Man

An Oil Painting of
People around a Campfire

A photo of a dog

A photo of a man

A photo of the Amalfi Coast

An oil painting of a
snowy mountain village
Part 1.9: Hybrid Images
We can also use the diffusion model to create hybrid images. We just do a high pass filter and low pass filter on different set of noises we are sending through the model, then sum them after applying the filters.

Skull/Waterfall

Old man/Village

Skull/Village
Part B: Diffusion Models from Scratch!
In this part, I am implementing and deploying UNet that is trained to generate images from the MNIST dataset.
Part 1: Training a Single-Step Denoising UNet
In this part, I am implemented a UNet that does Single-Step Denoising. It was trained with a sigma of 0.5. Below are the results from training and sampling this UNet.
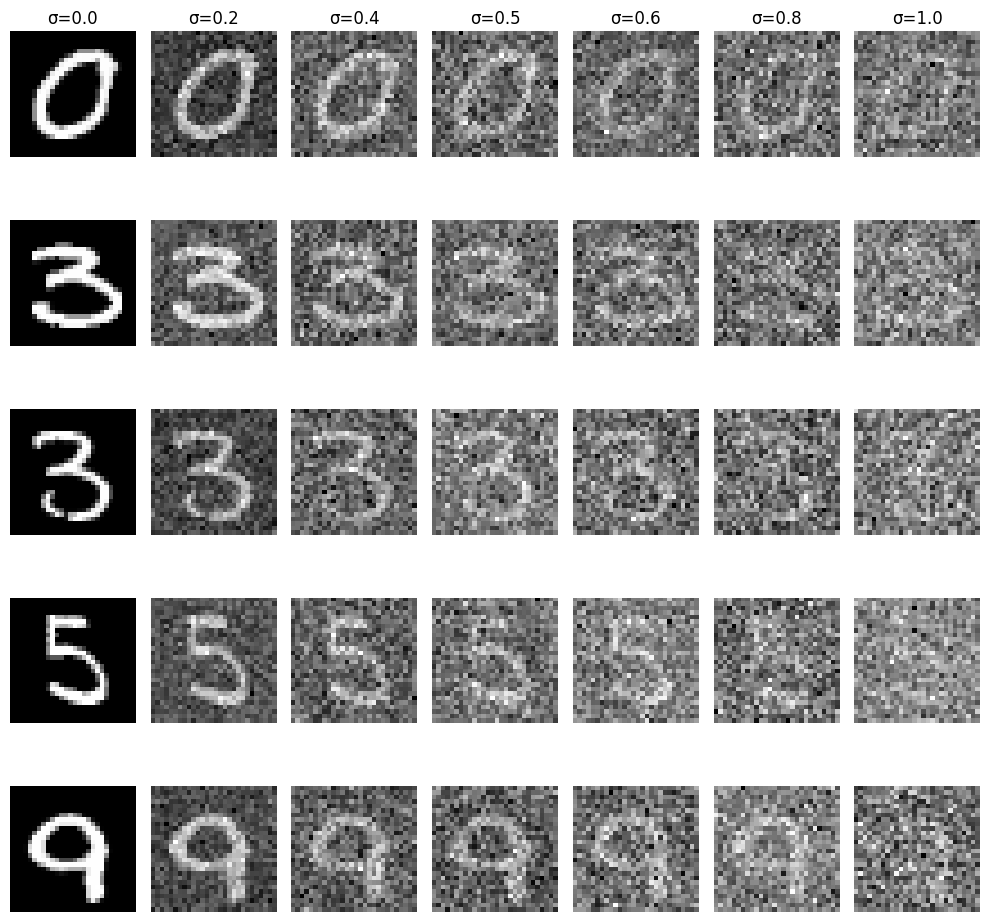
Visualization of the denoising process on sample images
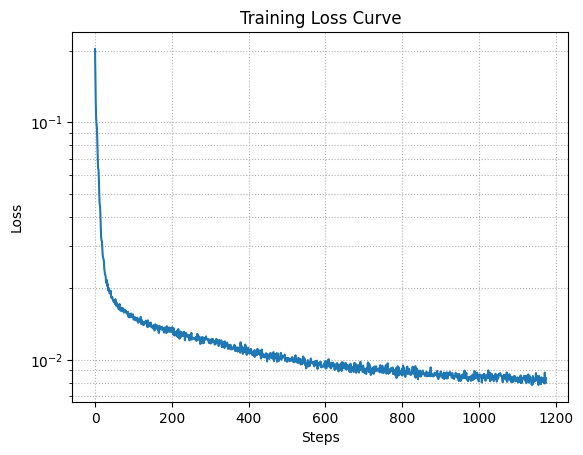
Loss curve from training the single-step denoiser
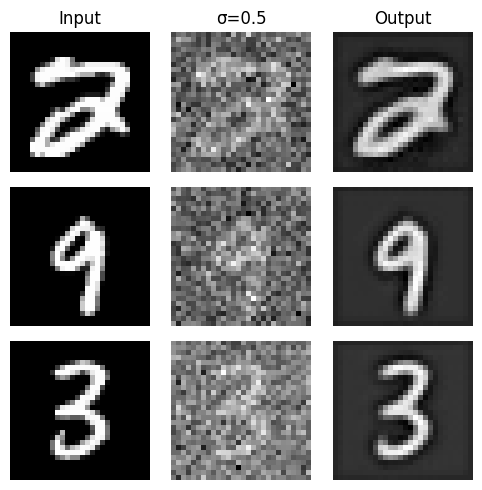
Results on digits from the test set after 1 epoch of training
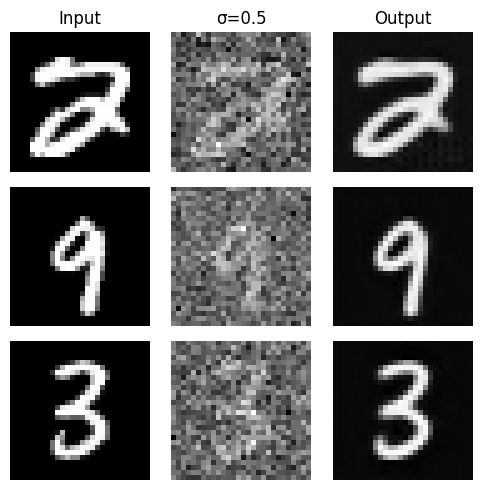
Results on digits from the test set after 5 epoch of training

Results on digits from the test set with varying noise levels.
Part 2: Training a Diffusion Model
Adding Time Conditioning to UNet
Now to move onto creating a diffusion model which iteratively denoises an image. The UNet is trained using DDPM.
After training our model will be able to iteratively denoise images. However, it won't be great because we haven't
conditioned fully it. This is similar to above where the denoising was amazing but the images were still nonsensical.
Basically, the images aren't on totally on image manifold, yet; they are close.
Below are the results from adding time conditioning to the UNet
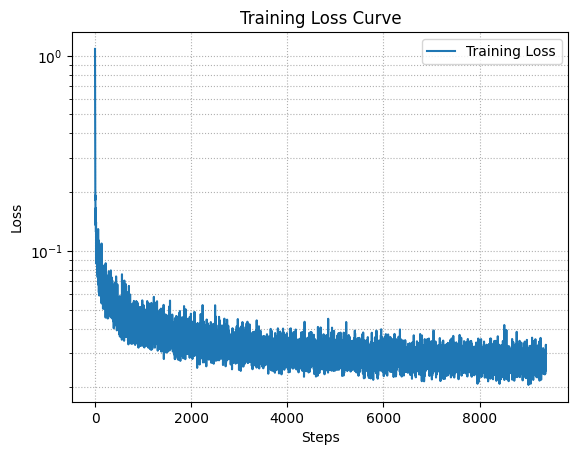
Loss curve from training the diffusion model after 20 epochs
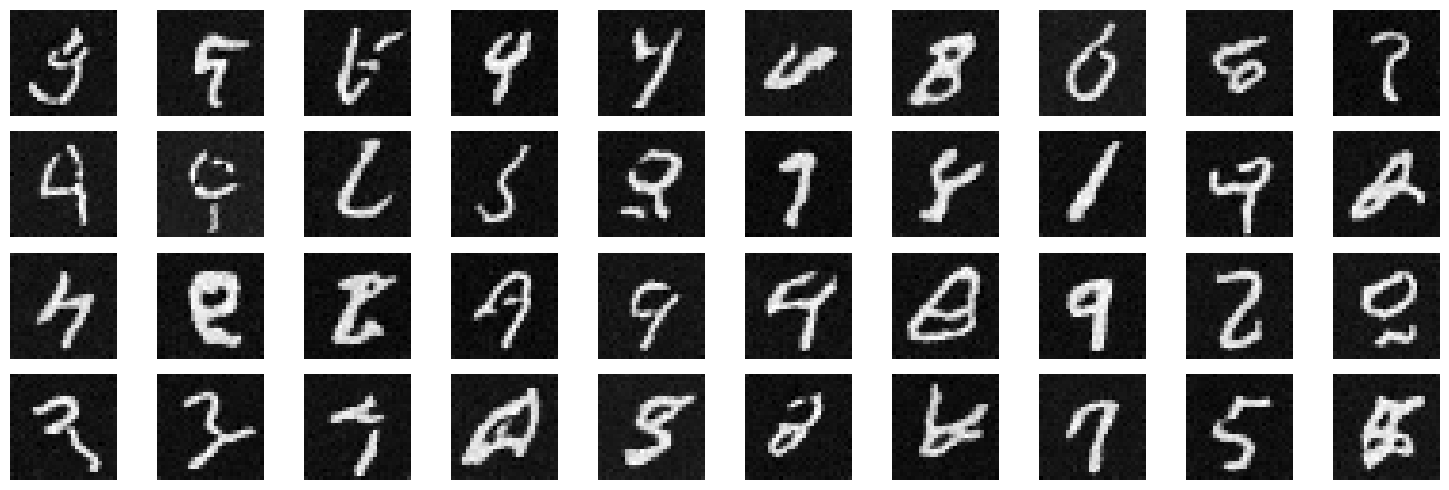
Results on digits from the test set after 5 epoch of training
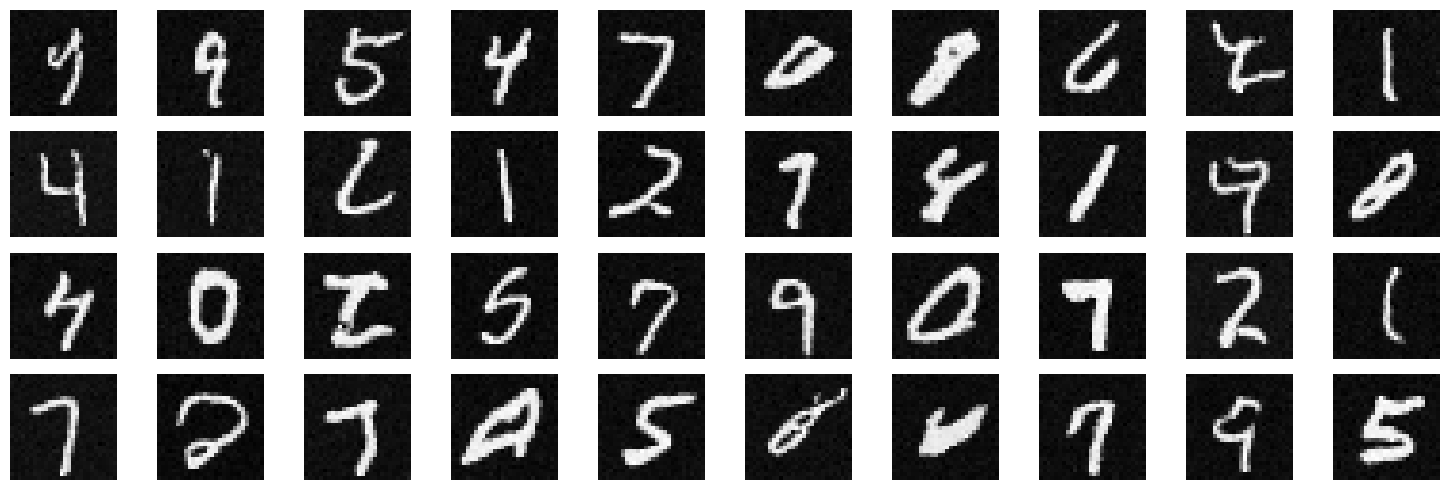
Results on digits from the test set after 20 epoch of training
Adding Class-Conditioning to UNet
Now we will add class conditioning to the UNet. This will help it to denoise images even better, since they will be trained
on the specific numbers and their labels. We will be able to generate images of numbers we specify.
This is similar to giving a text prompt and getting a similar image to the prompt.
Below are the results from adding class conditioning to the UNet.
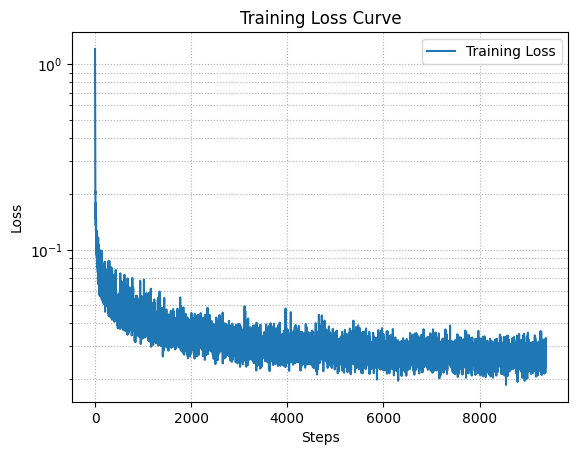
Loss curve from training the diffusion model after 20 epochs
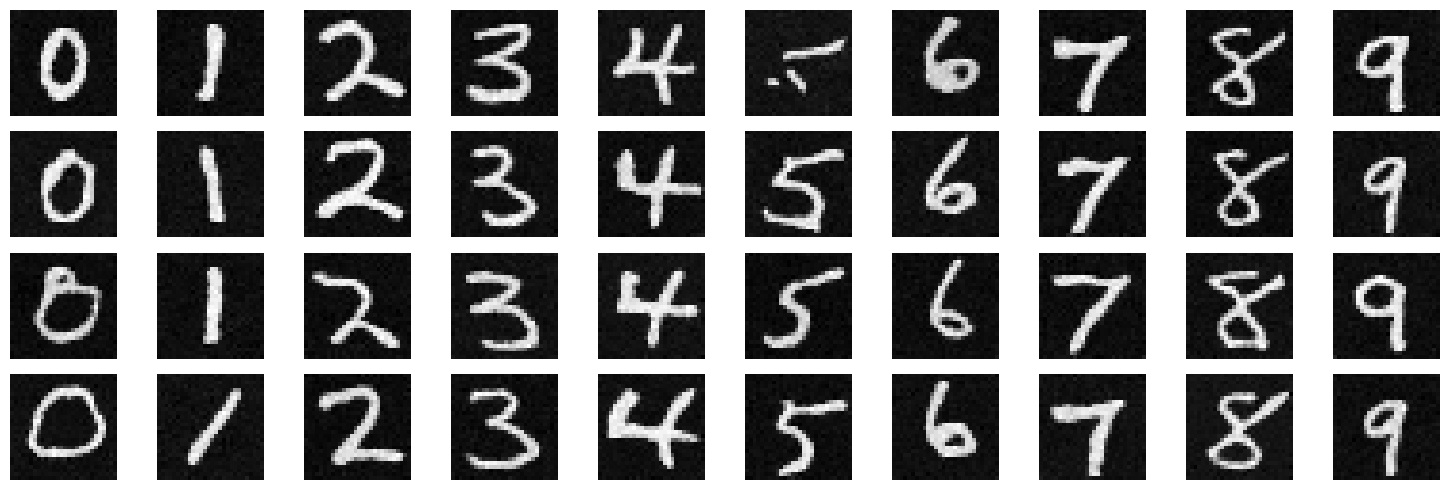
Results on digits from the test set after 5 epoch of training
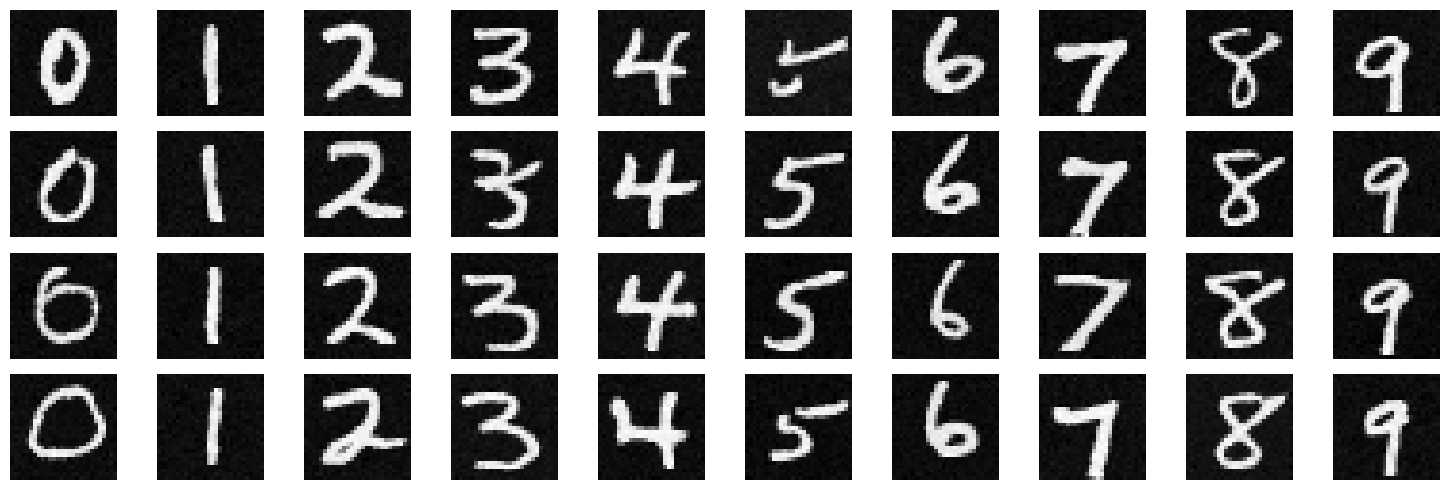
Results on digits from the test set after 20 epoch of training